Simple back hand mehndi designs are loved for their clean beauty and light appearance. Many people prefer styles that look pretty without covering the entire hand. These designs work well for small gatherings, family celebrations, or everyday wear. They are also perfect for beginners who want to practice neat henna lines without creating complicated artwork.
Another great part is that simple mehndi designs are affordable and easy to create at home. A small henna cone, a steady hand, and a few easy patterns are enough to make your hands look beautiful. Many of these designs take less than 15 minutes to draw. That makes them ideal when time is short but you still want something elegant.
Below are light and beautiful back hand mehndi design ideas that anyone can try. Each style focuses on simple lines, balanced spacing, and soft patterns that make the hand look graceful.
Minimal Floral Center Design
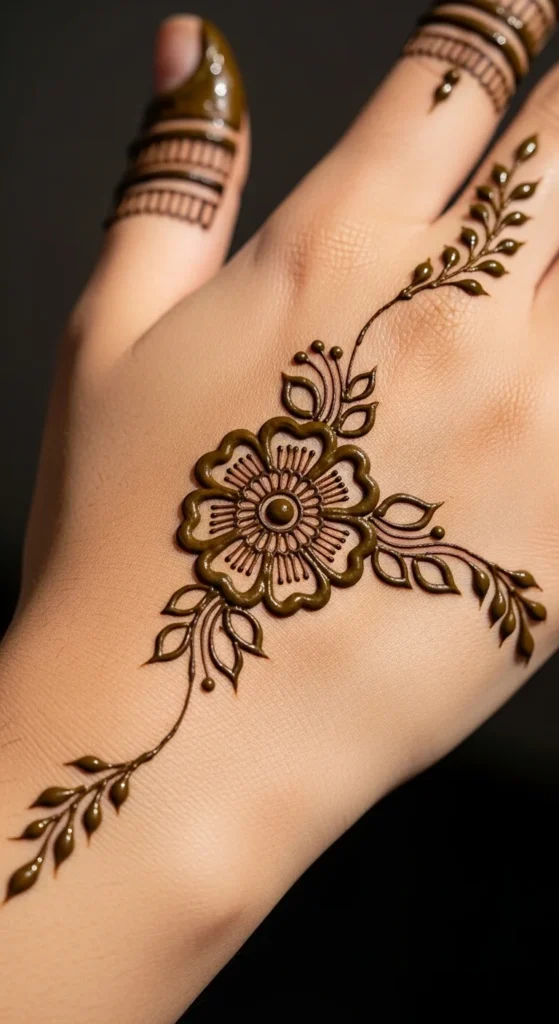
A minimal floral center design is one of the easiest back hand mehndi patterns to try. The idea is simple. A small flower sits in the center of the hand, and thin lines extend slightly toward the fingers.
Start by drawing a small circle. Then add five or six petals around it. Keep the petals round and smooth. Small leaves or dots can be added around the flower.
This design works well because it leaves plenty of empty space. That space keeps the hand looking light and clean.
For beginners, this style is very friendly. You only need a few steady strokes. Even if the petals are not perfectly shaped, the design still looks beautiful.
Budget tip: practice the flower shape on paper first. This helps you control the henna cone better.
You can also extend the design slightly by drawing tiny dots toward the index finger. These dots add charm without making the design heavy.
This design works well for casual events or simple family gatherings.
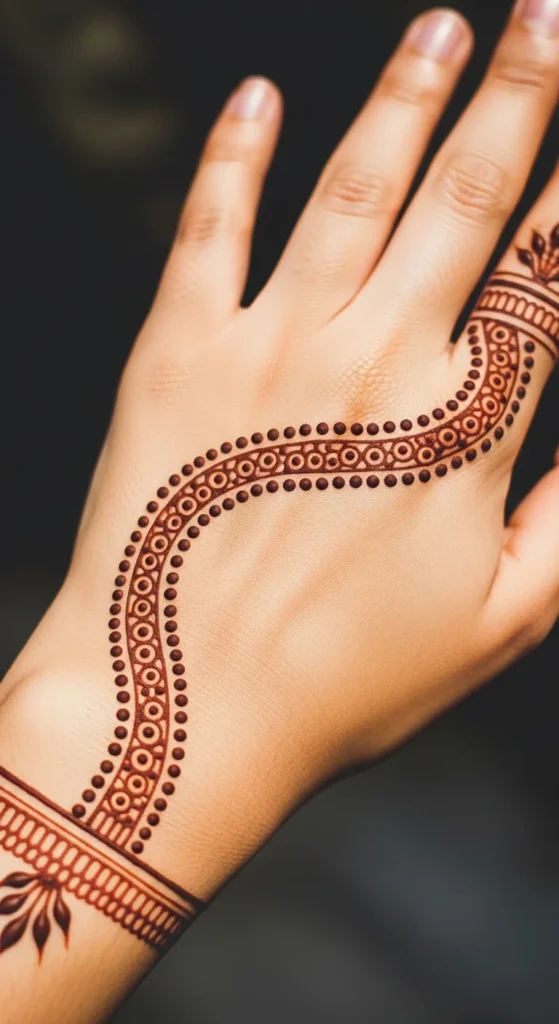
Elegant Finger Trail Pattern
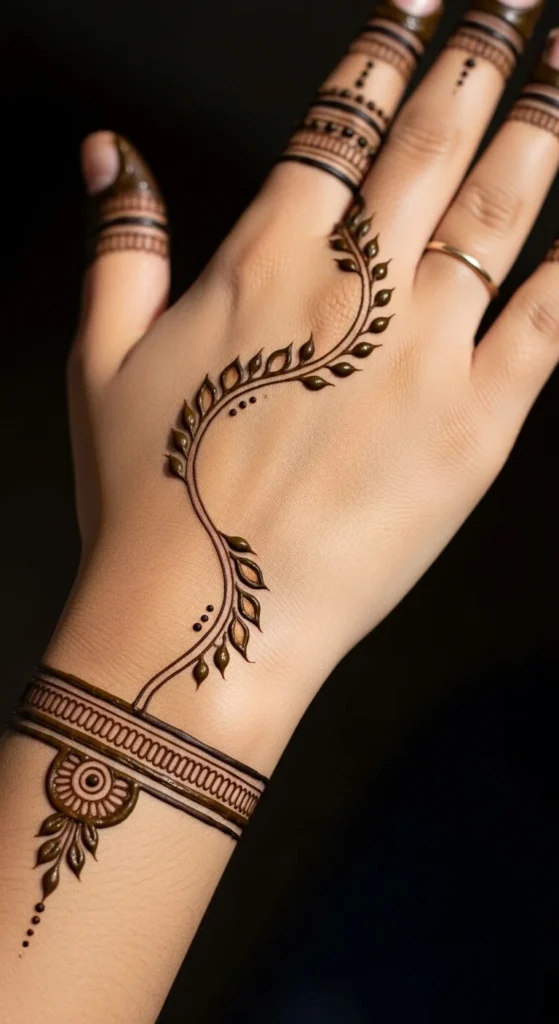
The finger trail pattern creates a graceful path across the hand. It begins near the wrist and slowly moves toward one finger.
The line should stay thin and smooth. Along the path, draw tiny leaves or dots. These small shapes create a flowing appearance.
Many people like this design because it makes the hand look longer and more elegant.
If you want a little extra detail, add small lines on the finger itself. These can be tiny leaf shapes or short curves.
This style is perfect when you want something simple but stylish.
DIY tip: use slow pressure on the henna cone. This helps you control the thickness of the line.
Another idea is to create the trail toward the ring finger. This area naturally attracts attention and looks very graceful.
Because the design uses only a few lines, it also dries quickly.
That makes it a great option when you’re getting ready for an event and time is short.
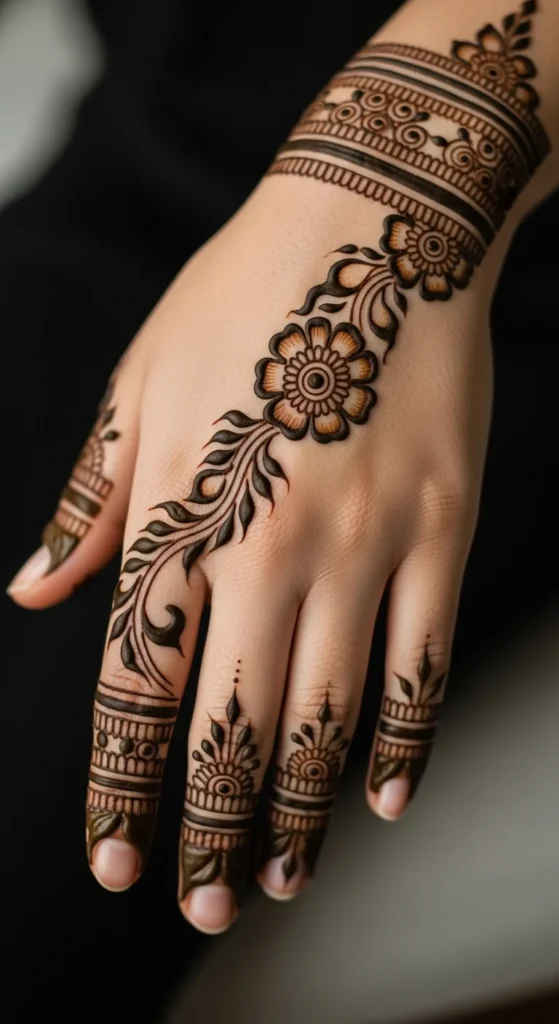
Delicate Bracelet Mehndi Style
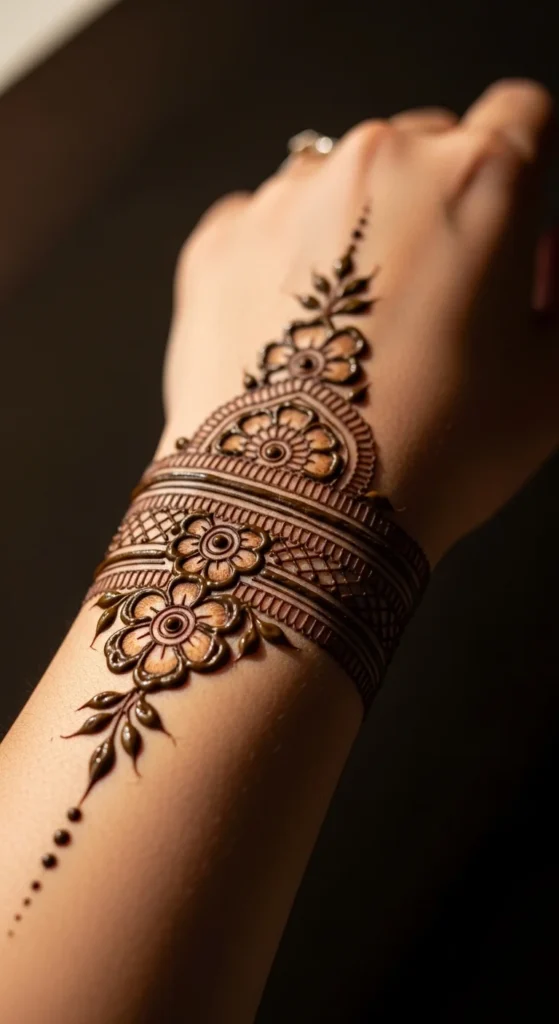
A bracelet mehndi style focuses mainly on the wrist area. The pattern looks like a decorative bracelet drawn with henna.
Start with two parallel lines around the wrist. Inside those lines, draw small flowers, dots, or leaf shapes.
This style looks very neat on the back of the hand.
You can keep the rest of the hand empty or add tiny dots moving toward the fingers.
One helpful trick is to use a mirror while drawing the bracelet. This helps keep the pattern balanced.
Budget-friendly idea: if you are learning mehndi, use a simple repeating pattern. Small dots and leaves are easy to repeat and look beautiful.
Bracelet designs are popular for casual occasions. They also match nicely with real bangles or bracelets.
Because the design stays near the wrist, it is also quick to create.
Even beginners can complete it in about ten minutes.
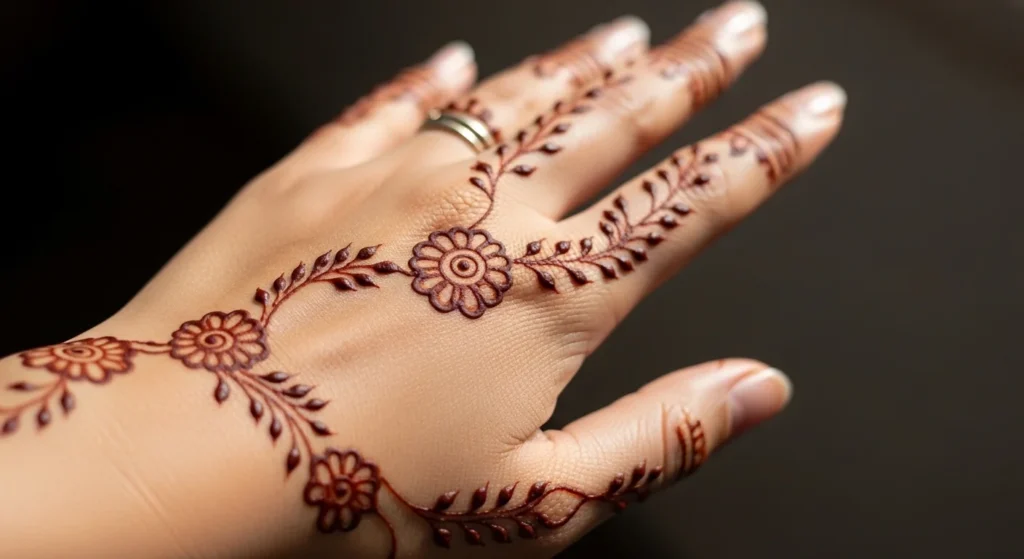
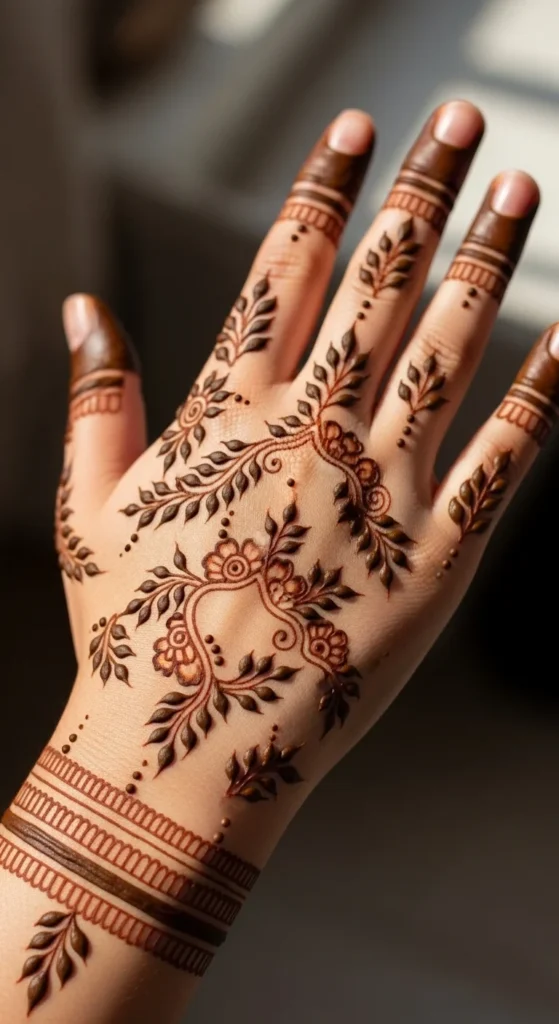
Single Vine Mehndi Design
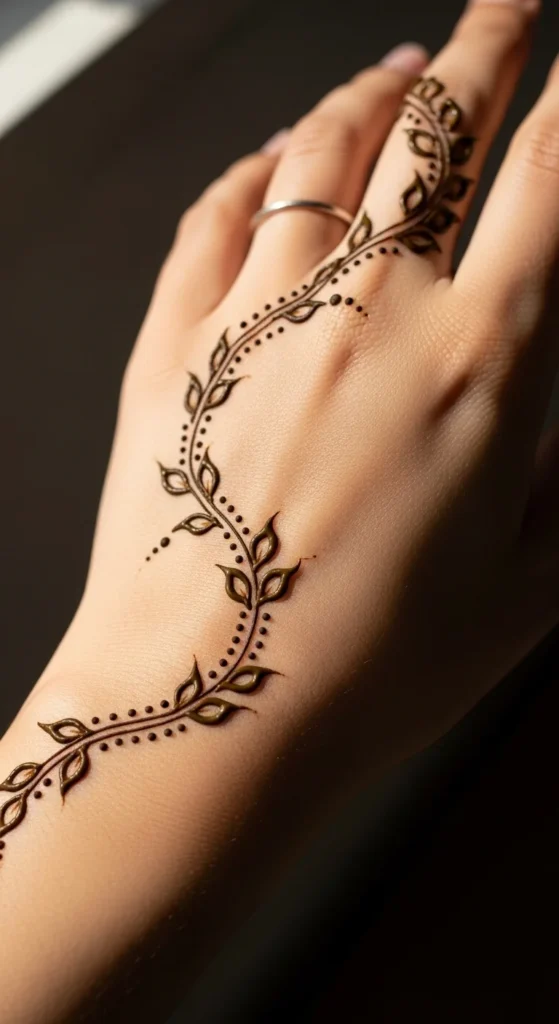
A single vine design creates a soft natural look on the hand. The vine usually moves diagonally across the back of the hand.
Start with a thin curved line. Then add small leaves on both sides.
Keep the leaves simple. Small teardrop shapes work perfectly.
This design looks beautiful because it feels balanced and light.
You can extend the vine toward the middle finger. A few tiny dots near the leaves can add a gentle decorative touch.
For beginners, vines are easy to draw. The shapes repeat, so practice becomes easier with each leaf.
Helpful tip: draw the vine slowly so the curve stays smooth.
You can also make the leaves slightly smaller near the finger area. This creates a natural flowing effect.
Single vine designs are great for daily wear. They look pretty without covering the entire hand.
Tiny Mandala Accent
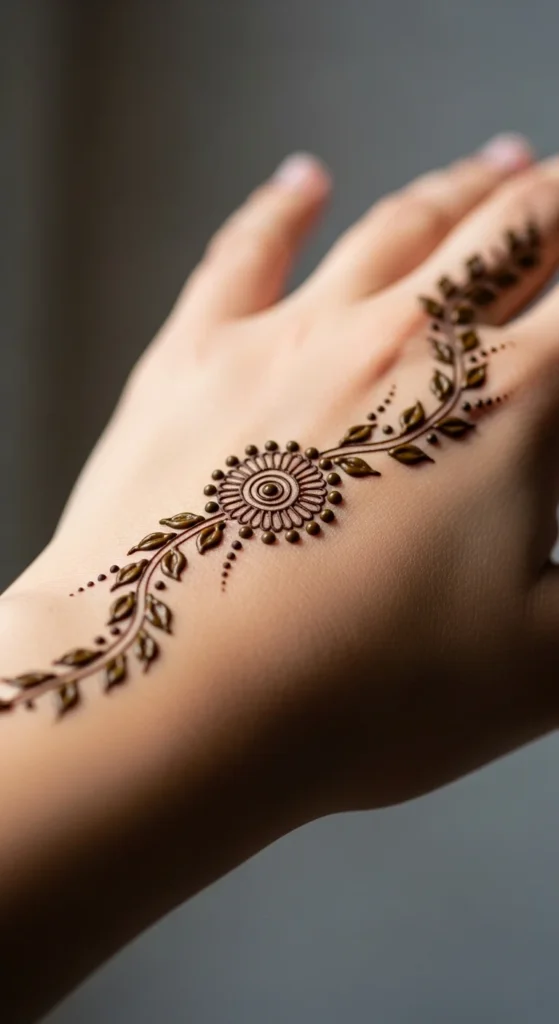
A tiny mandala design brings a classic touch while still staying simple.
The mandala starts with a small circle in the center of the hand. Around that circle, draw layers of tiny petals or dots.
Each layer grows slightly larger.
Because the design stays compact, it looks neat and balanced.
One advantage of this design is that it suits almost any occasion.
You can also extend a few dotted lines toward the fingers to create a light decorative effect.
DIY tip: practice small circles on paper first. This helps your mandala look more even.
Mandala designs may look complex, but a small version is actually easy to draw.
The key is patience and gentle pressure on the henna cone.
This design works well for weddings, festivals, and family events.
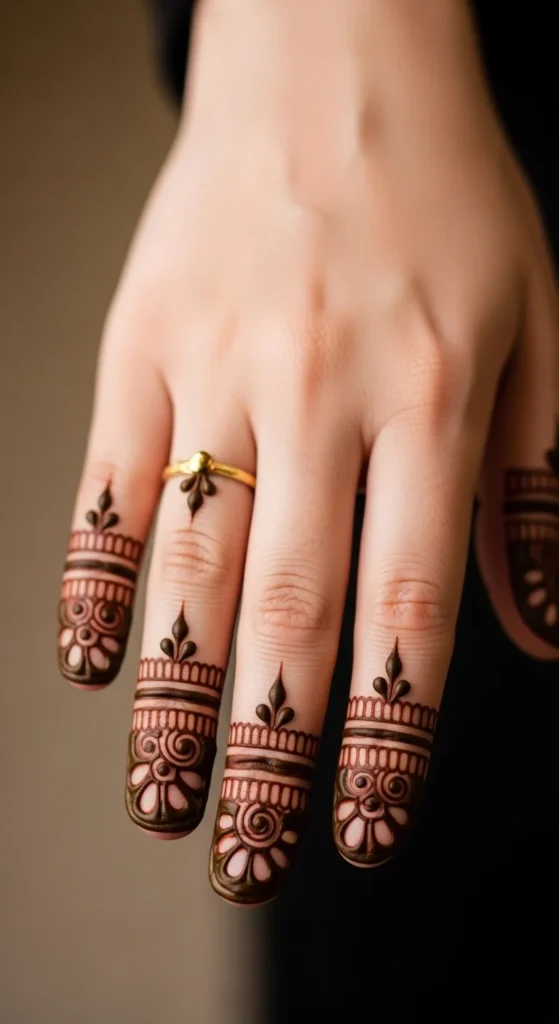
Finger Ring Mehndi Design
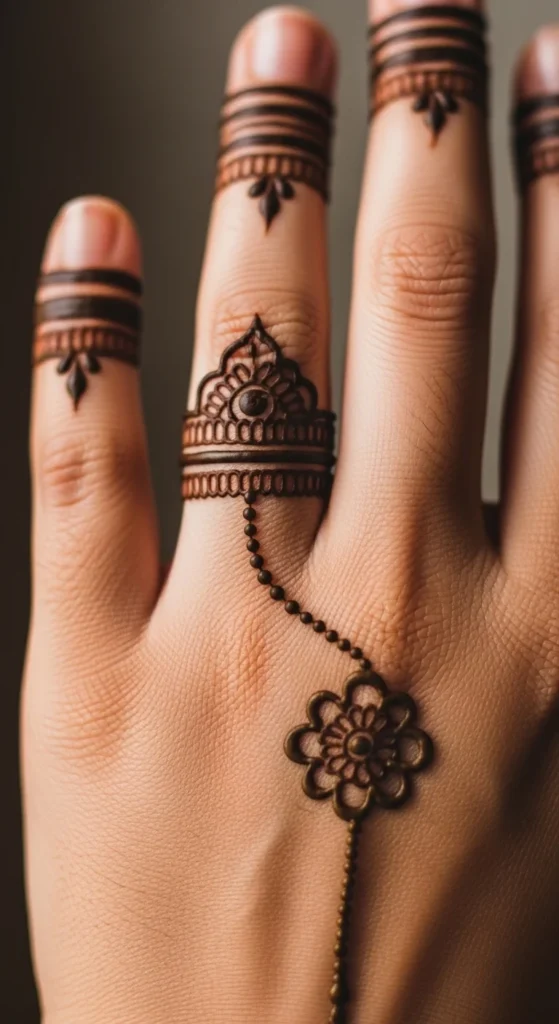
The finger ring mehndi style creates the look of a delicate henna ring.
Start by drawing a thin band around one finger. Small dots or leaf shapes can decorate the band.
From the ring, draw a fine line connecting to a small motif on the hand. This can be a flower or tiny mandala.
The design looks stylish but remains very light.
Many people enjoy this design because it resembles jewelry.
Budget tip: pair this design with simple rings for a coordinated appearance.
It also works nicely for engagement parties or small gatherings.
Because the pattern is small, it takes very little time to complete.
Even beginners can try it confidently.
Dotted Path Mehndi Style
A dotted path design is one of the easiest mehndi styles.
Instead of drawing thick lines, this pattern uses tiny dots placed close together.
Start near the wrist. Create a curved dotted path toward one finger.
You can add slightly larger dots in the center areas for variety.
The result looks soft and decorative.
This design is excellent for beginners who are still learning to control henna flow.
Helpful tip: tap the cone gently to create round dots.
Dotted designs also dry quickly because the henna layer is thin.
That makes them convenient for busy days.
You can also combine dots with small leaf shapes for extra charm.
Light Leaf Pattern
A leaf pattern design creates a calm natural look.
Small leaves can be placed across the hand in a loose arrangement.
You do not need to connect every leaf. The scattered style looks soft and airy.
Each leaf can be a simple teardrop shape.
Add a tiny center line inside the leaf to give it detail.
Budget-friendly tip: practice drawing leaves repeatedly on paper. Once you learn the shape, the design becomes very quick.
This style works well for everyday mehndi.
It also pairs nicely with casual outfits.
Because the leaves are small, the design looks neat without feeling crowded.
Simple Finger Cap Mehndi
A finger cap design focuses mainly on the tips of the fingers.
Small curved patterns cover the upper finger area.
These shapes may include dots, tiny leaves, or small scalloped lines.
The rest of the hand stays mostly empty.
This contrast creates a very stylish appearance.
Finger cap designs are quick to apply.
They also work well when you want mehndi but prefer something minimal.
DIY tip: draw a curved guide line first, then fill the shape with dots.
This keeps the design neat and balanced.
Finger caps are often used with modern mehndi styles.
They look beautiful with short or long nails.
Tiny Heart Mehndi Motif
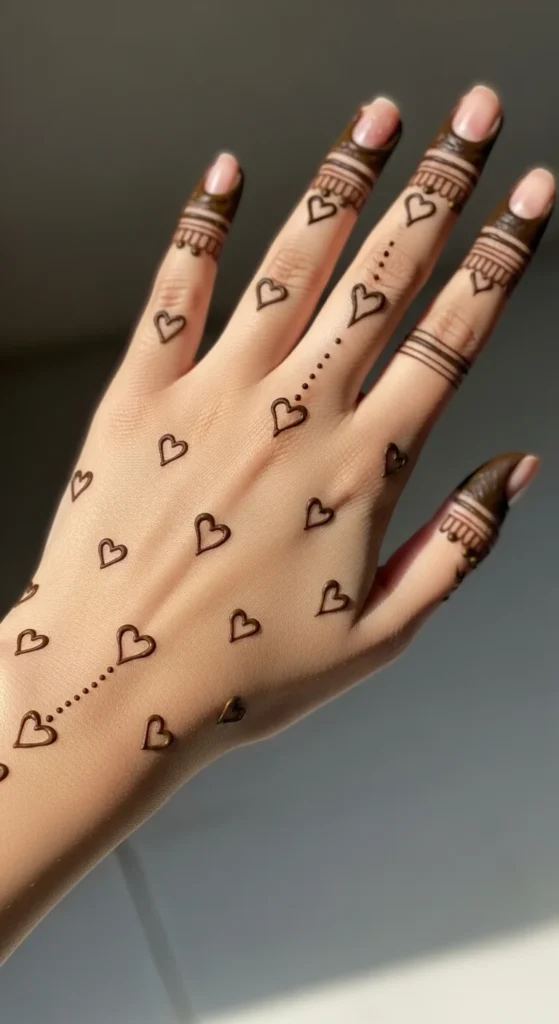
A tiny heart motif design adds a playful and charming look.
Small hearts can be drawn across the hand in a gentle pattern.
You can place one heart near the center and a few along the fingers.
Tiny dots around the hearts help fill small spaces.
This design works well for casual gatherings or fun celebrations.
Helpful tip: draw two small curved lines to form each heart. Keep them thin for a soft appearance.
The hearts do not have to be identical. Slight differences make the design feel natural.
This style is also quick to apply.
Even beginners can draw simple hearts with a little practice.
Conclusion
Light back hand mehndi designs are perfect for anyone who enjoys simple beauty. These patterns focus on clean lines, soft shapes, and open space. They look graceful without covering the entire hand.
Another great advantage is that most of these designs are beginner-friendly. With a small henna cone and a little practice, anyone can create them at home. They also work well for daily wear, small gatherings, and festive moments.
Try a few styles, practice slowly, and soon drawing beautiful simple mehndi designs will feel easy and fun.