Simple front hand mehndi designs remain a favorite for people who like elegance without heavy patterns. Clean layouts, soft curves, and balanced spacing make these designs easy to wear for daily life, weddings, and festive gatherings. Many styles can be drawn at home with basic cones and a little patience.
Front hand mehndi is often the first place people notice. A tidy design makes the hand look graceful without covering every inch of skin. This style works well for beginners because the shapes are small and repeatable. Even simple dots, vines, and floral shapes can create a polished result.
The ideas below focus on simple, stylish, and clean patterns that are beginner-friendly. Each one can be created with affordable mehndi cones and a few steady strokes.
Minimal Floral Vine
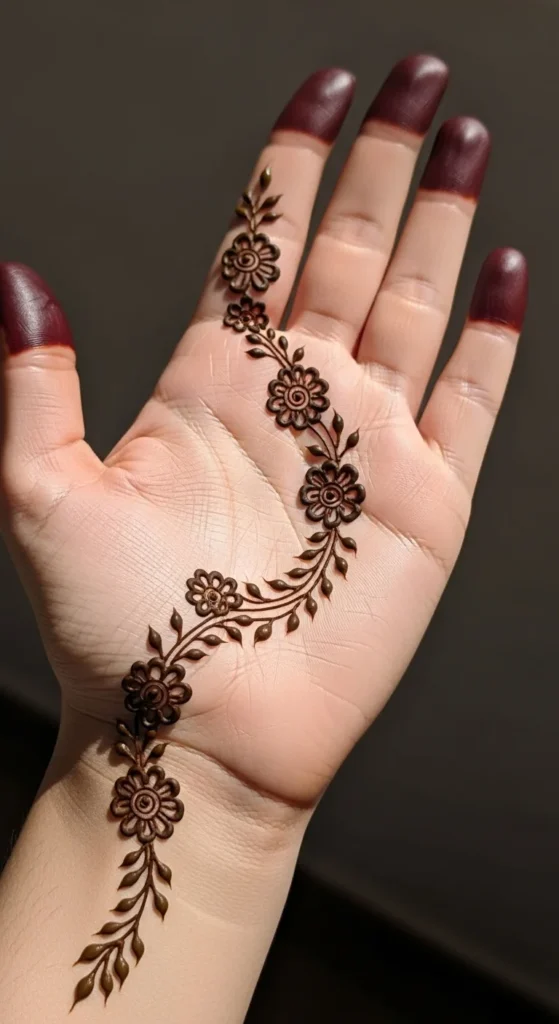
A minimal floral vine is one of the easiest mehndi styles to try at home. The design starts near the wrist and gently climbs across the palm. Small flowers connect through thin curved lines that look like vines.
The key here is spacing. Leave small areas of skin visible between each element. This keeps the design looking light and neat.
Start with three small flowers on the palm. Draw them using tiny circles and rounded petals. Connect them using a thin curved line. Add a few leaves along the line for balance.
Finger details can stay simple. Add two small leaf shapes or dots near the base of each finger. Avoid filling the entire finger so the design stays clean.
Budget tip: practice drawing the vine shape on paper first. This helps build muscle memory before using the mehndi cone.
This design works well for casual events. It also pairs nicely with bracelets or rings since the pattern does not crowd the wrist area.
Classic Finger Lines
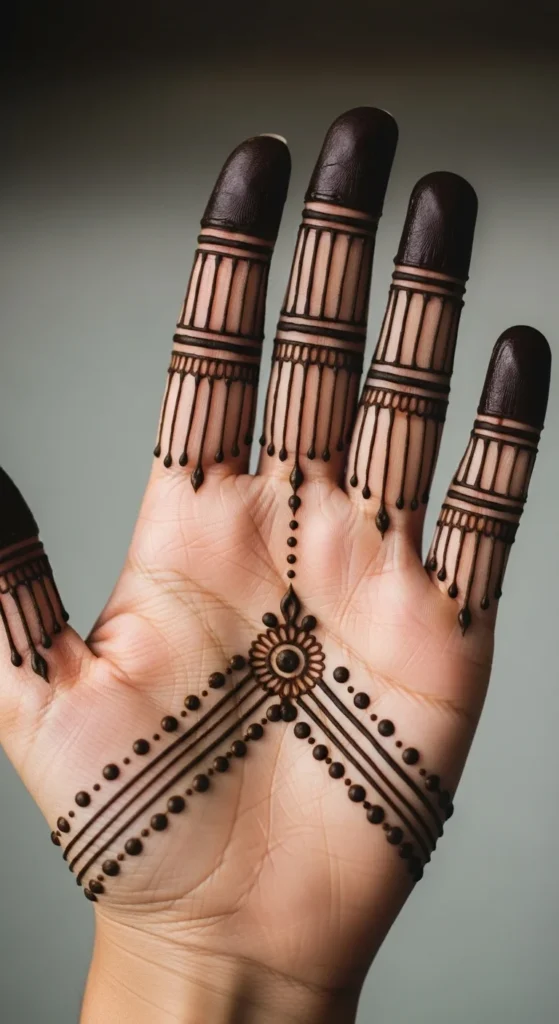
Classic finger lines create a stylish look with very little effort. The focus stays on the fingers while the palm remains simple.
Start by drawing thin parallel lines across each finger. These can run horizontally like delicate bands. Keep the lines evenly spaced for a tidy effect.
Add a small motif in the center of the palm. A tiny flower or circle works perfectly. This anchors the design without making it look busy.
Dots can also be added between the finger bands. This small detail adds personality without crowding the pattern.
This style works well for beginners. Straight lines are easier to control than complex shapes.
Use a fine-tip mehndi cone for cleaner lines. If the cone opening is too wide, cut only a tiny tip.
This design suits everyday wear. It also looks beautiful with nail polish since the fingers remain the highlight.
Mandala Center Design
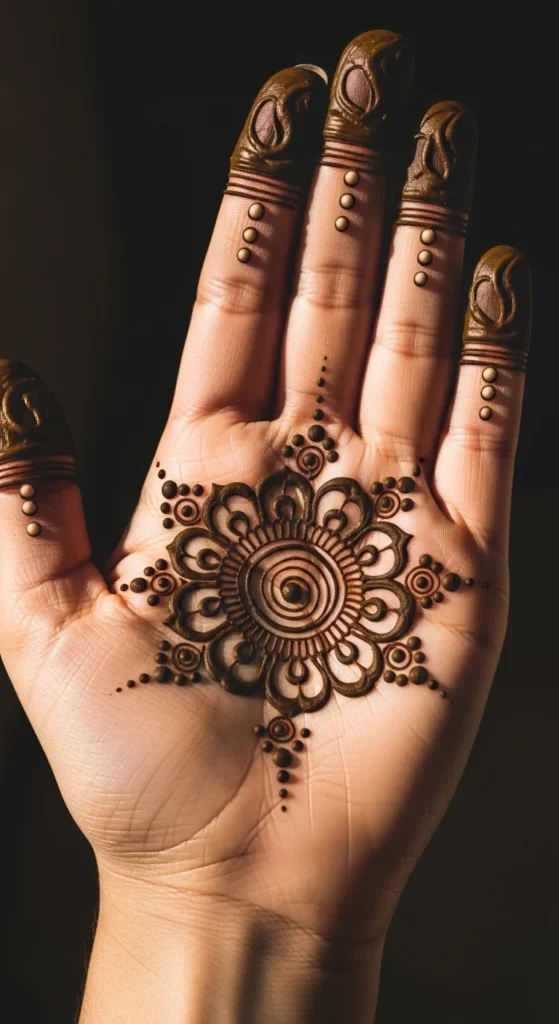
A small mandala in the center of the palm creates a balanced and graceful look. The circular shape draws attention while the rest of the hand stays minimal.
Start with a tiny circle in the center of the palm. Around it, draw small rounded petals forming a neat ring.
Add another ring of slightly larger petals if space allows. Keep each stroke steady and consistent.
Finger decoration can stay minimal. Add a few dots along the finger joints. This keeps the overall style simple.
One helpful trick is using a coin to guide the first circle. Lightly trace the shape with the cone before filling details.
Mandala designs look symmetrical, which makes them appear polished even if the pattern is simple.
This design works well for celebrations like Eid or family gatherings. It looks detailed without taking hours to create.
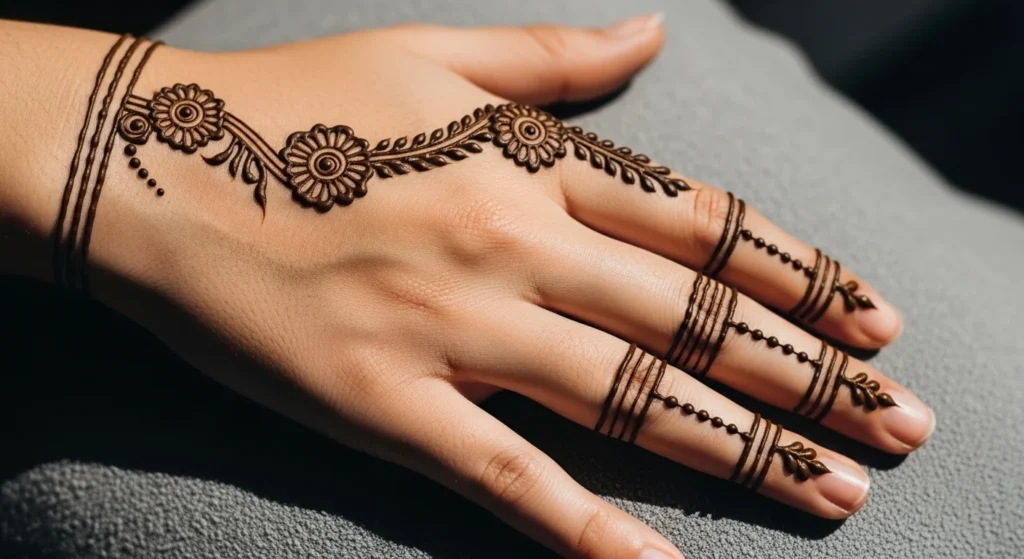
Bracelet Style Mehndi
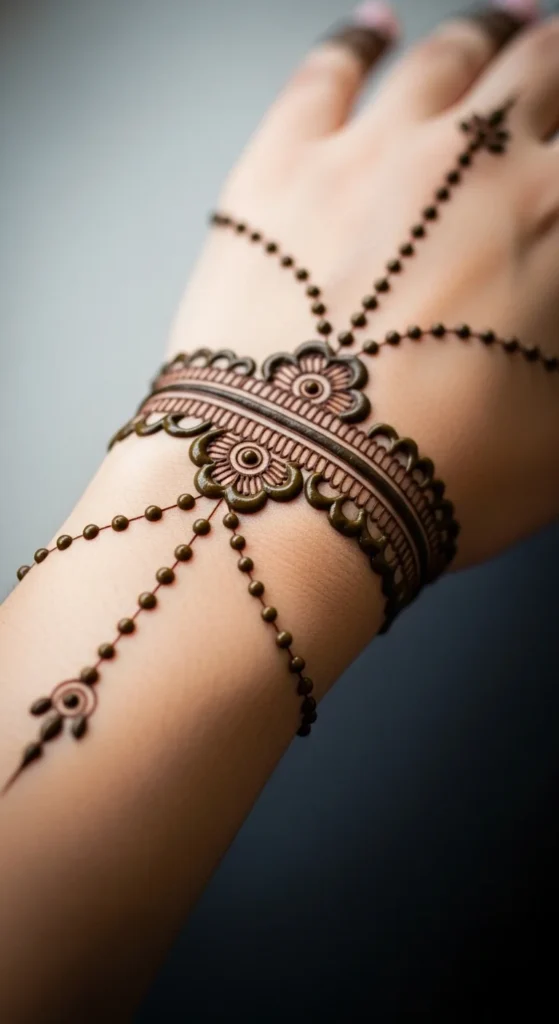
Bracelet mehndi designs focus mainly on the wrist area. The pattern looks like jewelry made with henna.
Begin with two thin lines wrapping around the wrist like a bracelet band. Keep the lines parallel.
Between the lines, add small flowers, leaves, or dots. These tiny shapes fill the bracelet section without making it heavy.
Extend a thin chain of dots from the bracelet toward the center of the palm. This connects the design gently.
Finger tips can include tiny leaf shapes or short lines. Keep them small so the bracelet remains the highlight.
This design works well if you want something stylish but quick. It usually takes less than fifteen minutes.
It also pairs nicely with real bangles or watches since the henna pattern resembles jewelry.
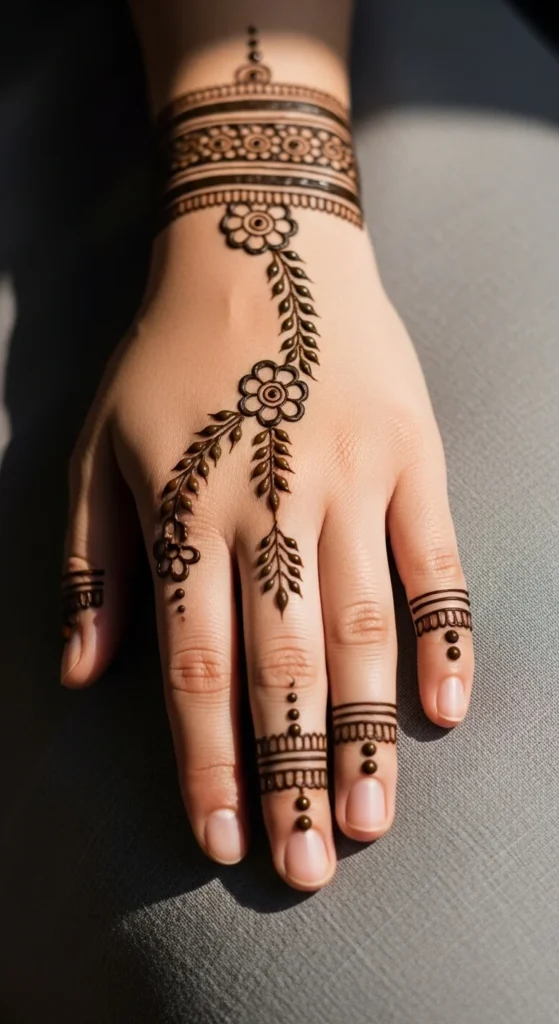
Diagonal Leaf Trail
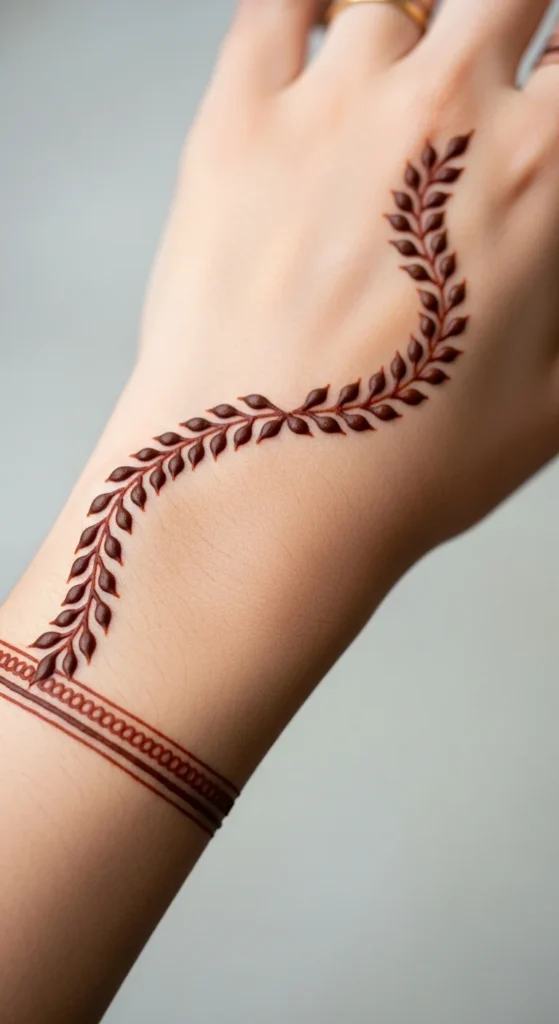
A diagonal leaf trail gives the hand a graceful flow. The design begins near the wrist and travels upward across the palm.
Draw a thin curved line first. This acts as the vine.
Next, add small leaf shapes along both sides of the line. Keep each leaf simple and evenly spaced.
As the vine approaches the finger, the leaves can become slightly smaller. This adds visual balance.
You can decorate one finger with a few tiny leaves to finish the pattern.
This style works well for beginners because leaves are easy to draw. Each one uses just two curved strokes.
Practice drawing leaf shapes repeatedly on paper before starting. This builds confidence with the cone.
The result looks stylish while remaining very clean.
Half Palm Floral Pattern
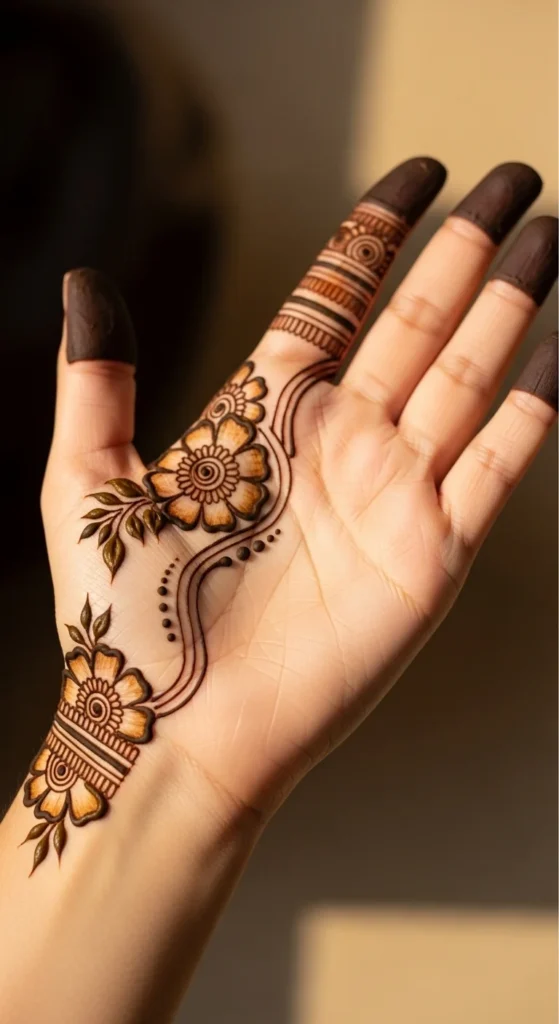
Half palm designs create a modern and airy appearance. Instead of filling the entire hand, only one side carries the pattern.
Begin near the thumb area. Draw two or three medium flowers.
Connect them using thin curved lines. These lines help the design flow naturally across the palm.
Add small dots around the flowers. These fill empty spaces without making the pattern crowded.
Leave the other side of the palm blank. This contrast keeps the design clean.
Finger details can stay minimal with tiny dots near the base.
This approach works well for beginners since fewer shapes are required.
The result looks stylish and balanced.
Tiny Heart Mehndi Design
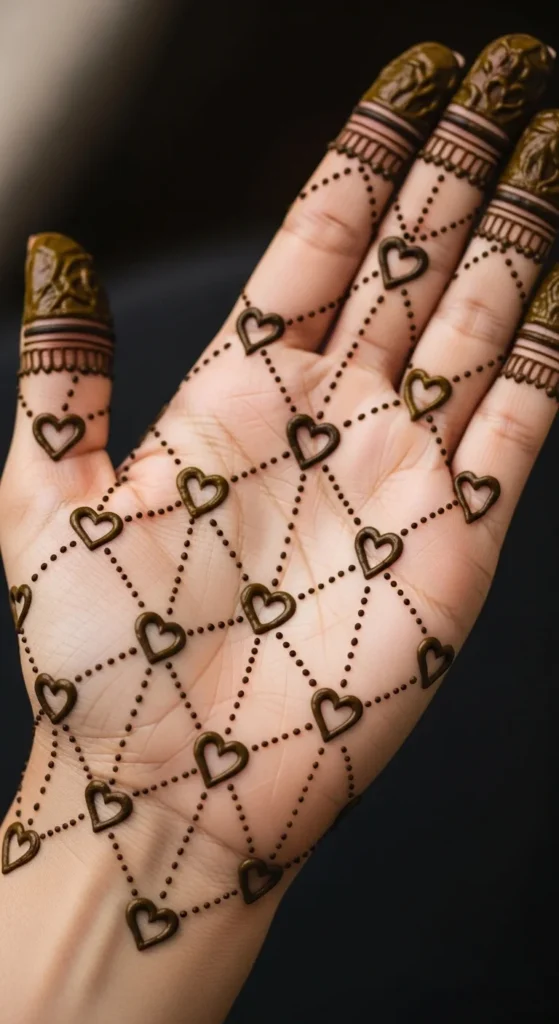
Heart mehndi designs bring a playful touch to front hand patterns. The shapes are small and easy to draw.
Start by placing one tiny heart in the center of the palm. Add two smaller hearts nearby.
Connect them with dotted lines or tiny curves. This creates a gentle flow across the palm.
You can also place a small heart near the base of each finger.
The design looks cute while staying very simple.
Beginners often find heart shapes easy to control with a mehndi cone.
Practice drawing the outline slowly before filling it slightly thicker.
This style works nicely for casual events or simple gatherings.
Dot Grid Mehndi
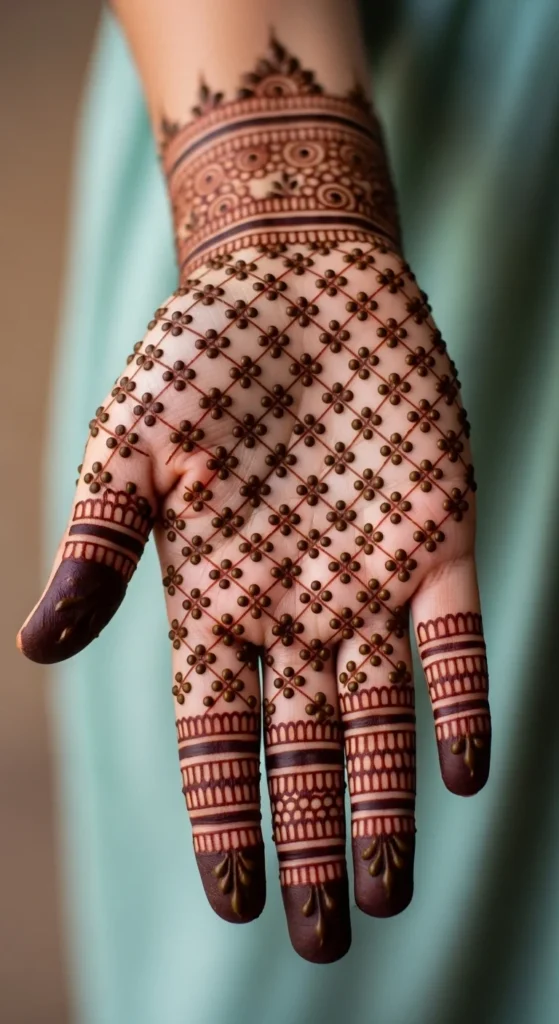
Dot grid designs are among the easiest mehndi styles. The entire pattern uses small dots arranged in rows.
Start by placing dots evenly across the palm. Try to keep the spacing consistent.
Once the grid forms, connect some dots with tiny curved lines. This adds visual interest.
Finger sections can feature two rows of dots near the joints.
Dot designs look stylish because of their neat layout.
They are also perfect for beginners who want a quick pattern.
Use light pressure on the cone so the dots stay small and round.
This design works well for everyday wear.
Elegant Ring Pattern
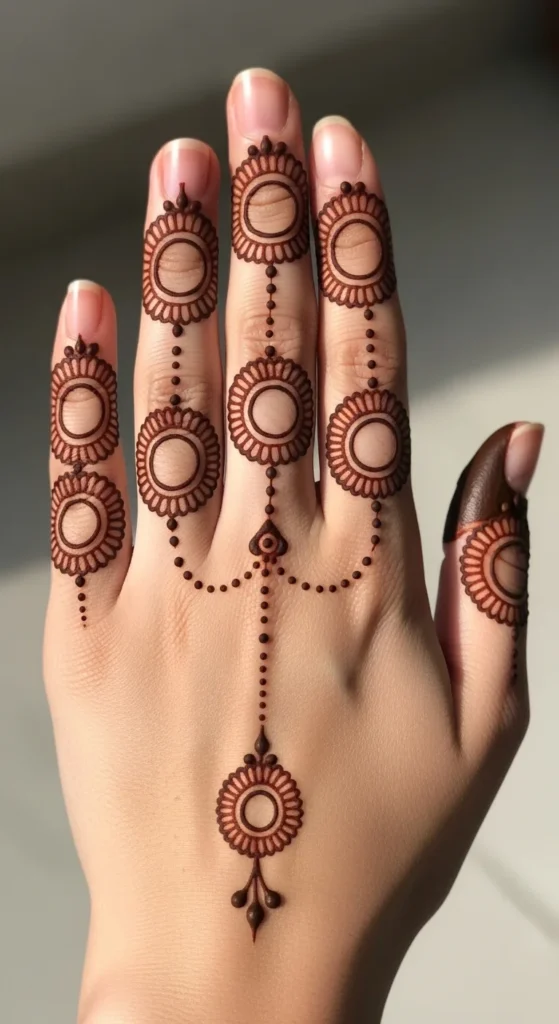
Ring-style mehndi focuses on the fingers. The design looks similar to wearing henna jewelry.
Draw thin circular bands around the middle of each finger. These act like rings.
Add tiny dots around the bands to decorate them.
On the palm, create a small flower or circle that connects to one finger through a dotted line.
This layout keeps the design balanced.
It also highlights the fingers without filling the entire palm.
Practice drawing small circles before starting. Smooth rings make the design look polished.
This pattern looks beautiful for gatherings or family events.
Conclusion
Simple front hand mehndi designs can look stylish without complicated shapes or heavy coverage. Small florals, vines, dots, and finger details often create the most graceful results. These patterns are easy to practice at home using affordable mehndi cones and basic strokes.
Try a few designs on paper first. Once your hand feels steady, apply the pattern slowly and enjoy the process. With practice, even the simplest strokes can create a beautiful mehndi design that looks clean and elegant.