Simple mehndi designs for hands remain a favorite choice for people who want elegance without spending hours on complicated patterns. Clean lines, delicate dots, and graceful curves can create stunning results that look stylish yet easy to apply at home. Whether you are preparing for a festive gathering, a family function, or simply enjoying creative self-care, simple designs offer beauty without stress.
Another advantage is affordability. A single henna cone and a little patience can produce designs that appear refined and artistic. Many people prefer minimalist patterns because they dry faster and feel lighter on the skin. They also suit beginners who are learning how to control henna flow.
The ideas below focus on practical, beginner-friendly mehndi styles that anyone can recreate. Each design uses small elements like vines, flowers, dots, or geometric shapes. With a bit of practice, these patterns can turn plain hands into graceful works of art.
Minimal Floral Vine Design
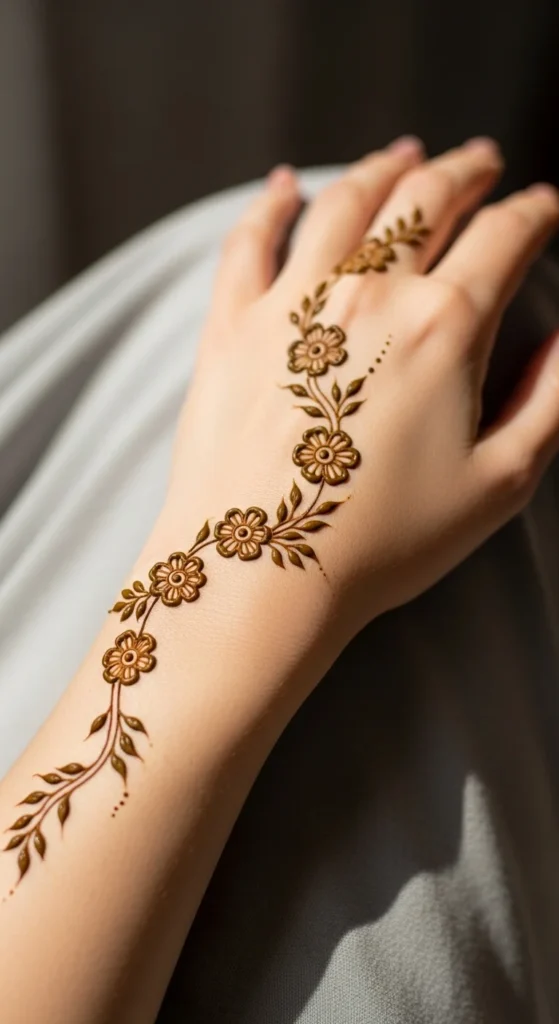
Floral vines remain one of the easiest mehndi patterns for beginners. The design flows naturally across the hand and does not require perfect symmetry.
Start with a thin curved line from the wrist toward the index finger. This becomes the vine. Add tiny leaves along the curve. Small oval shapes work well and are easy to draw.
Place miniature flowers at a few points along the vine. Five-petal flowers look delicate and take only seconds to create. Add small dots around the petals to fill tiny empty spaces.
This design looks beautiful even when kept simple. Avoid crowding the hand. Leave open skin between elements so the pattern looks clean and airy.
For beginners, practice drawing leaves on paper before using henna. Try squeezing the cone gently to control line thickness.
A budget trick is to practice with a plastic sheet or old notebook page. This helps build hand control without wasting henna.
Floral vines also work nicely when extended slightly onto one finger. A short leafy trail across the index finger creates a graceful finish.
The result feels light, elegant, and easy to recreate whenever you want a quick design.
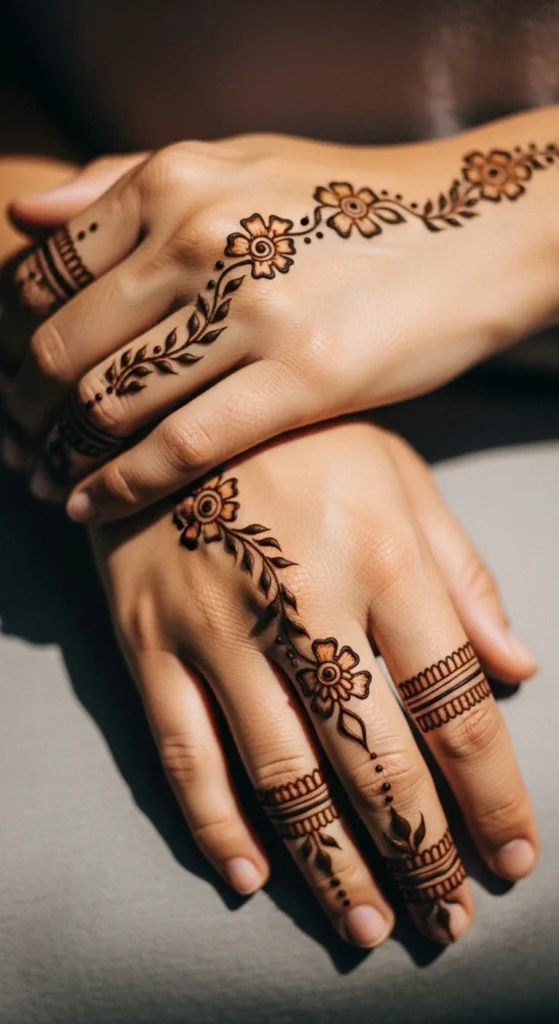
Classic Finger Trail Pattern
A finger trail pattern is perfect when you want something quick yet stylish. The design focuses on one finger and extends softly across the hand.
Start at the middle finger with a small floral element near the base of the nail. From there, draw a thin line traveling diagonally toward the center of the hand.
Add dots along the line. These dots create rhythm and make the design feel complete without adding many shapes.
Next, draw small leaf pairs beside the line. Keep them tiny and evenly spaced. This keeps the pattern neat.
Finger trails are popular because they leave much of the hand open. That open space gives the design a graceful appearance.
If you want extra detail, draw thin rings of henna across the finger joints. These simple bands look beautiful and take only seconds.
For beginners, use slow pressure on the cone so the line stays smooth.
This design works well for casual gatherings or simple festive events. It dries quickly and feels comfortable since the pattern is not heavy.
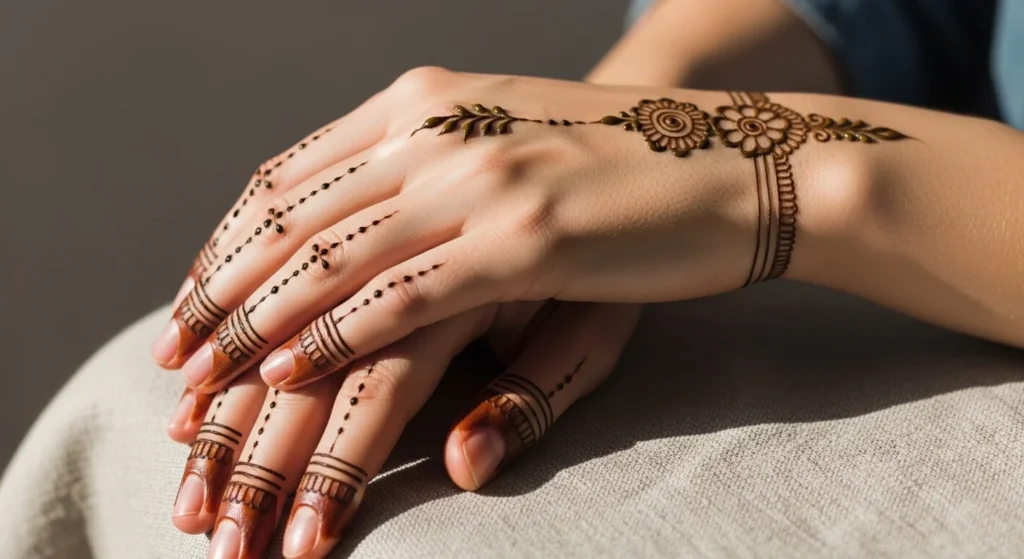
Wrist Bracelet Mehndi
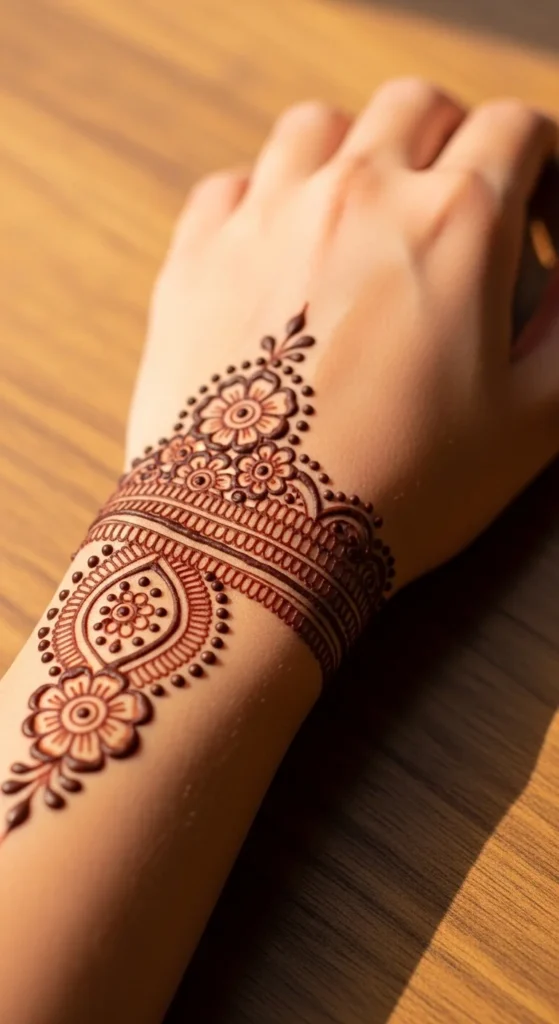
A wrist bracelet mehndi design looks graceful and works well with traditional outfits. It mimics the appearance of jewelry made from henna.
Start by drawing a thin band around the wrist. This becomes the bracelet base.
Add tiny scallop shapes along the edges. These curved arches create a lace effect.
Place miniature flowers inside the band. Small five-petal flowers are easy to repeat and fill the space neatly.
Dots play a big role in bracelet designs. Add rows of dots along the borders to enhance the pattern.
Many people pair this design with simple finger rings drawn using henna. Thin circles around one or two fingers connect nicely with the bracelet.
If your henna lines appear thick, wipe the cone tip gently and continue. Clean tips help produce neat designs.
This pattern is great for beginners because it focuses on a small area rather than the entire hand.
It looks especially elegant when worn with bangles or bracelets.
Tiny Heart Mehndi Pattern
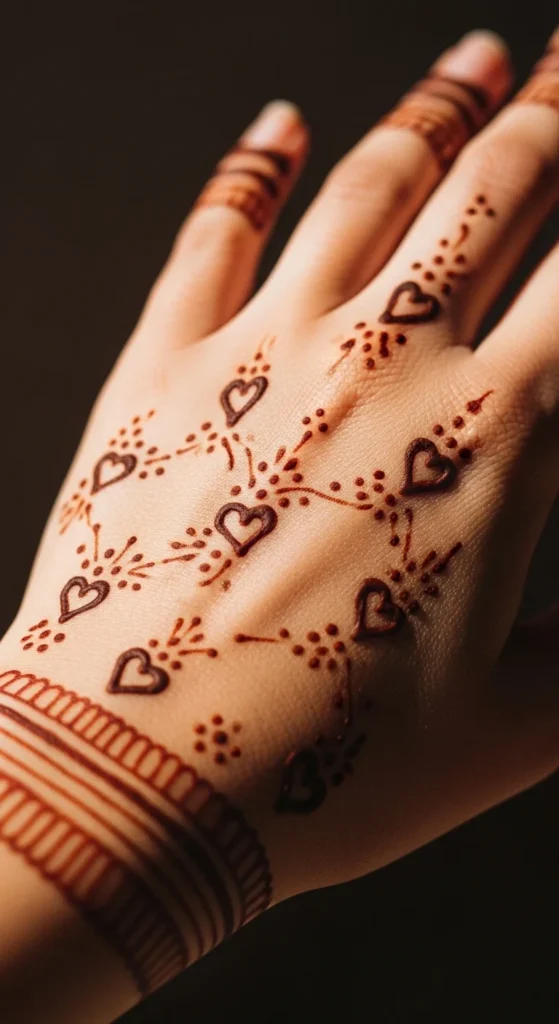
Tiny heart patterns bring a playful feel to simple mehndi designs. They are easy to draw and work well for beginners.
Begin with two small curved strokes forming a heart shape. Keep the hearts tiny so the design stays delicate.
Place one heart at the center of the hand. Then add a few more near the fingers.
Connect some hearts with thin curved lines. These lines make the pattern look intentional rather than random.
Dots help balance the design. Add clusters of dots around the hearts for decoration.
Another cute idea is drawing a mini heart ring around the ring finger using tiny connected hearts.
This design takes very little time and dries quickly.
For practice, try drawing hearts with a pencil first. This builds confidence before using henna.
Tiny heart designs suit casual celebrations or relaxed family gatherings. They also look charming in photos because the shapes are clear and recognizable.
Simple Mandala Center Design
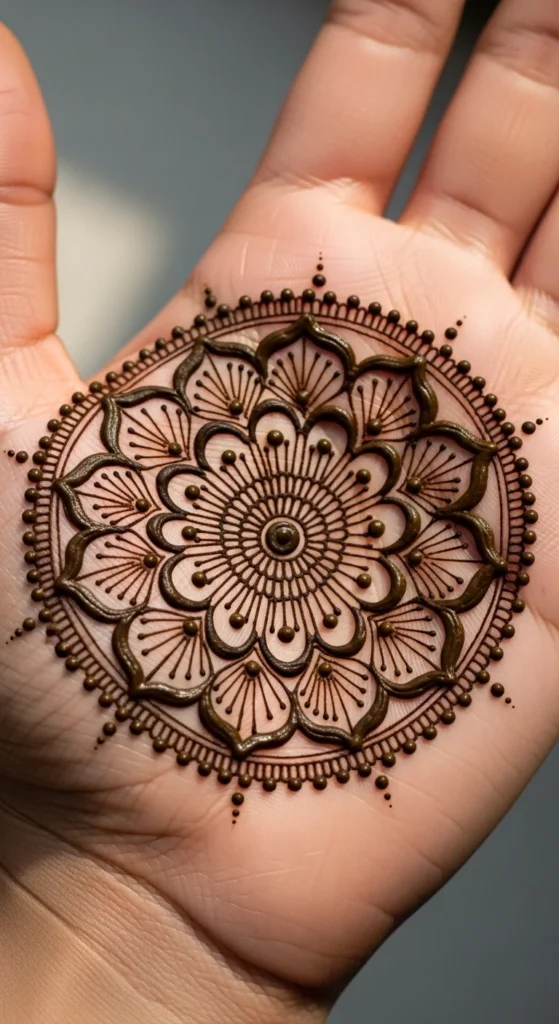
A mandala center design creates balance and symmetry. Even a simple version can look elegant.
Start with a small circle in the middle of the palm. This becomes the center of the mandala.
Draw petal shapes around the circle. Keep the petals rounded and evenly spaced.
Add a second layer of petals outside the first. These can be slightly larger.
Dots around the outer edge make the design look fuller without extra effort.
Many beginners stop here and leave the rest of the hand open. That open space makes the mandala stand out.
If you want more detail, draw tiny leaf patterns extending toward one finger.
Mandala designs look beautiful because the circular shape naturally attracts attention.
Practice drawing circles slowly. Rotate your hand rather than twisting the cone.
This design suits both beginners and experienced artists.
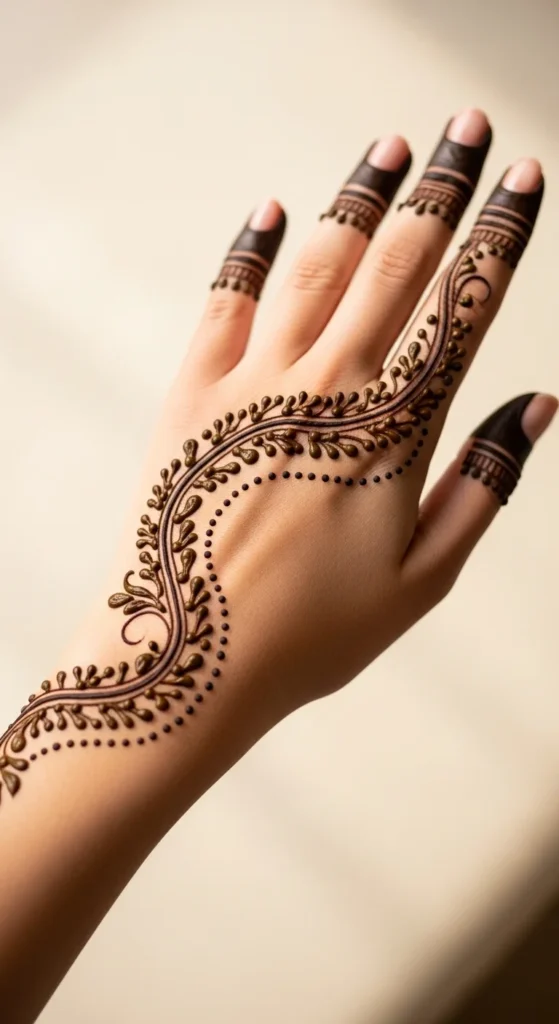
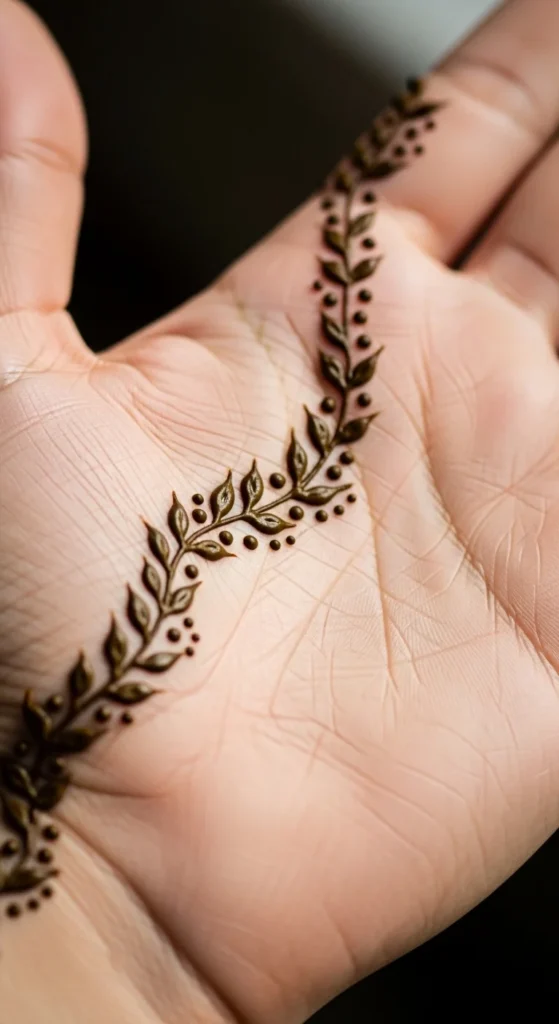
Leafy Finger Bands
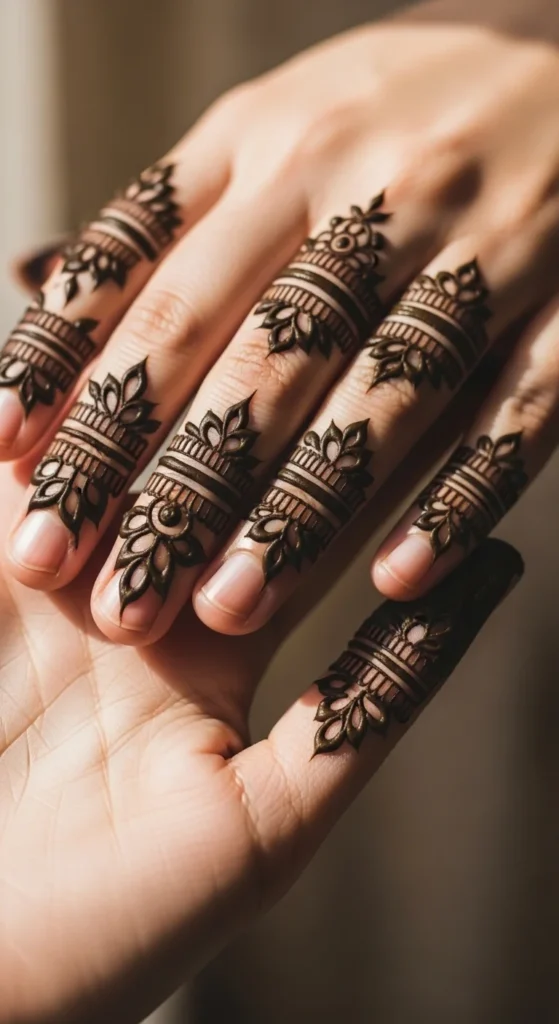
Leafy finger bands are simple yet elegant. They focus only on the fingers, leaving the rest of the hand clean.
Start by drawing thin horizontal bands across finger joints.
Inside each band, add tiny leaves connected by a thin line.
Dots can decorate the top and bottom edges of the bands.
This design feels light because the pattern stays on the fingers only.
It pairs beautifully with a small wrist motif.
Beginners appreciate this style because the shapes are small and repetitive.
Practice drawing tiny leaves before starting.
Leafy bands also look lovely when combined with a single flower on the back of the hand.
The design dries fast and feels comfortable during daily activities.
Diagonal Lace Mehndi
Diagonal lace designs give the hand a graceful flow. The pattern stretches from one corner of the hand to the other.
Start with two curved parallel lines moving diagonally across the hand.
Fill the space between them with tiny arches that resemble lace.
Add dots along the edges for decoration.
Some people include a small flower at the starting point near the thumb.
The diagonal direction helps the design look stylish without covering the entire hand.
Beginners can practice drawing arches slowly.
A steady hand helps keep the lace pattern neat.
This style pairs nicely with traditional outfits and looks lovely in photographs.
Minimal Dot Grid Mehndi
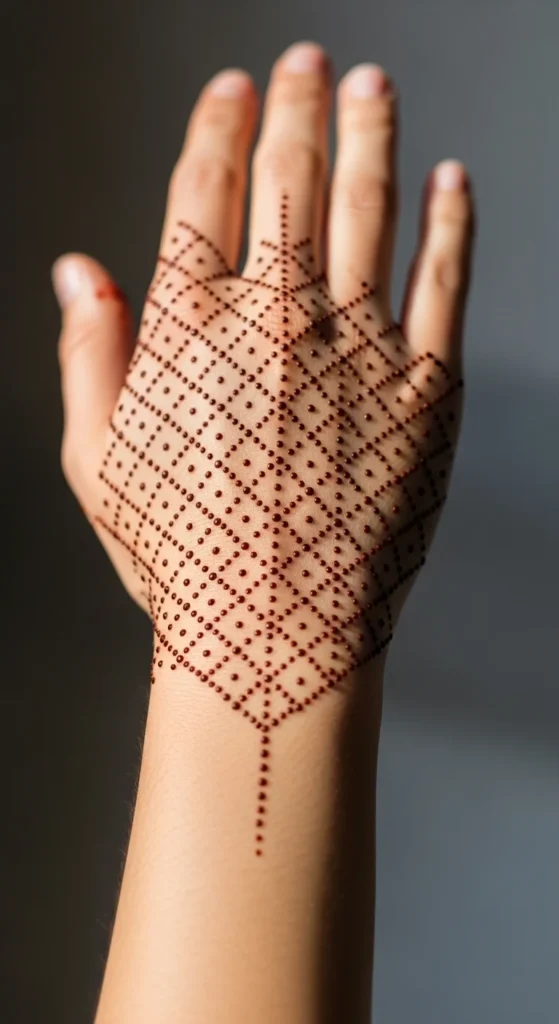
Dot grids are one of the easiest mehndi styles. They require patience more than drawing skill.
Start by placing evenly spaced dots across the hand.
Create small diamond shapes using groups of four dots.
Add tiny curved lines between some dots to form subtle patterns.
The design looks modern and neat because it uses simple shapes.
Beginners often enjoy this style since mistakes are easy to adjust.
If a dot becomes too large, add more dots nearby to balance the pattern.
Dot designs also dry quickly because the henna layer stays thin.
Flower and Ring Combo
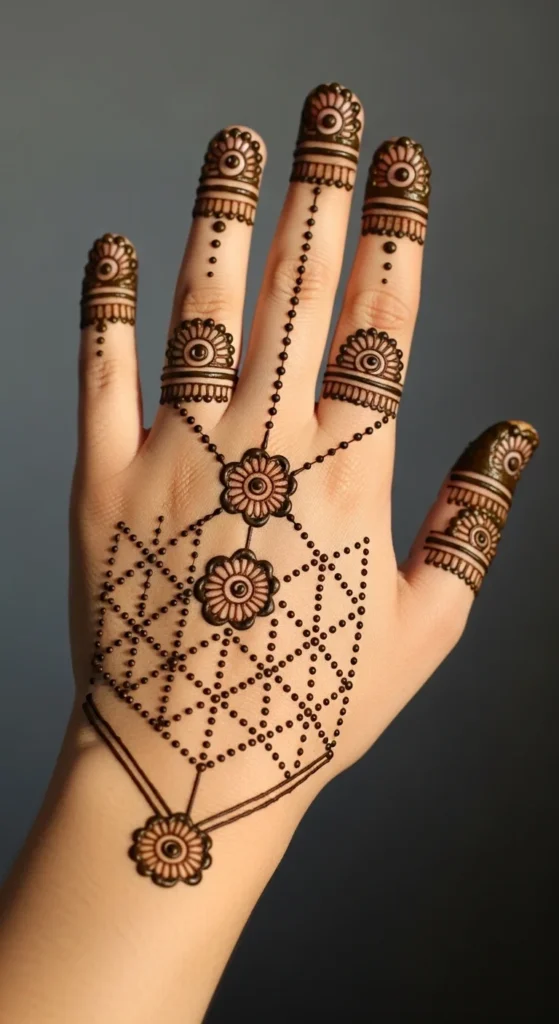
This design combines a central flower with simple finger rings.
Start with a small flower in the center of the hand.
Draw thin lines extending toward two fingers.
At the finger base, create small henna rings.
Decorate the rings with dots or tiny leaves.
The pattern looks balanced because the center flower connects the elements.
This style works well when you want something quick but elegant.
It also pairs nicely with real rings or bracelets.
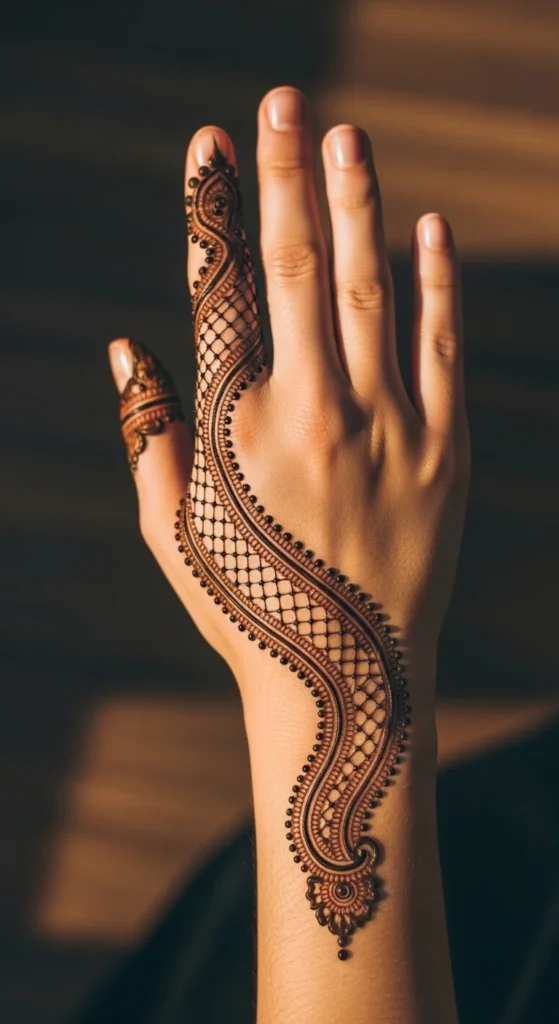
Palm Side Vine Design
Palm side vines look subtle and stylish.
Start near the base of the palm and draw a thin curved vine toward the little finger.
Add tiny leaves along the vine.
Place a few dots around the leaves for decoration.
Leaving the center of the palm open keeps the design light.
This style works well for beginners since it uses only a few elements.
Conclusion
Simple mehndi designs for hands prove that elegance does not require complicated patterns. Small flowers, dots, vines, and delicate lines can create beautiful results with minimal effort. These beginner-friendly ideas also allow plenty of room for creativity. With a single henna cone and a little patience, anyone can practice these styles at home. Try a few designs, experiment with spacing, and develop your own signature patterns that feel comfortable and stylish.